Genetec Security Center Integration
Tested versions
This integration has been tested with Genetec Security Center 5.13.1.0
ForensiQ allows for integration with the Genetec Security Center (Genetec SC) application suite in order to receive and review ForensiQ generated events in Genetec SC. Configuration is done via both the Genetec Security Center Config Tool and ForensiQ - follow the steps laid down below for complete integration.
Order the SDK connection from Genetec with the integration part number GSC-1SDK-Irisity-Professional to enable integration with ForensiQ. One such connection is required per ForensiQ instance.
Genetec Security Center configuration
User management and access control
ForensiQ requires access for integration with the Genetec Security Center, for which a new user should be created with administrator privileges.
-
In the Genetec Security Center Config Tool, click the button in the upper left corner of the window.
-
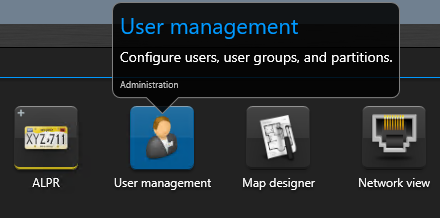
In the Administration category, select User Management.
- On the left sidebar, right click Administrators Add an entity User. Set the username, then type a password. The first and last names are optional. Click Next, then click Create. Close the user creation window.
- Click the Config Tool button in the upper left corner of the window.
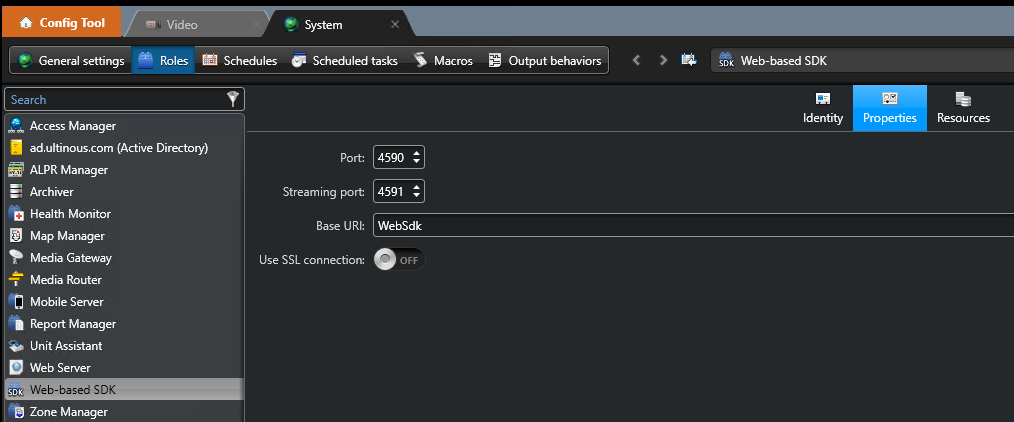
- Click System Roles Add an entity select Web-based SDK. In the upper button bar, select Properties.
-
Port (
4590by default): The port that the Web-based SDK will listen on. Make sure to note it down, as it will be needed in the next step. -
Streaming port (
4591by default): Not used by ForensiQ. -
Base URL (
WebSdkby default): You may leave this as default, or change it to a custom value. Make sure to note it down, as it will be needed in the next step. -
Use SSL connection (off by default): If you want to use SSL, tick this box and make sure to configure the SSL certificate in the Genetec Security Center Config Tool.
Camera registration
-
Click the Config Tool button in the upper left corner of the window.
-
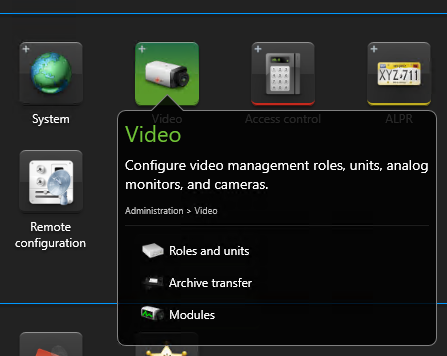
In the Administration category, select Video.
- On the left sidebar, right click Archiver Add an entity Video unit.
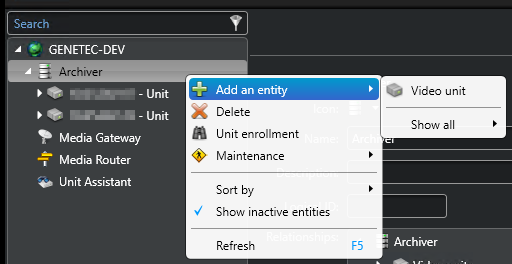
- In the popup window, fill in the properties of the camera of your choosing. When done, click Add and close.
Note
You may also try automatically discovering all connected cameras in your network by clicking the button on the bottom left button bar, then clicking Start discovery - Note that this may take a long time.
- In the left sidebar, select your newly added camera under Archiver and go to the Video tab Network settings select RTSP stream over TCP as the Connection type.
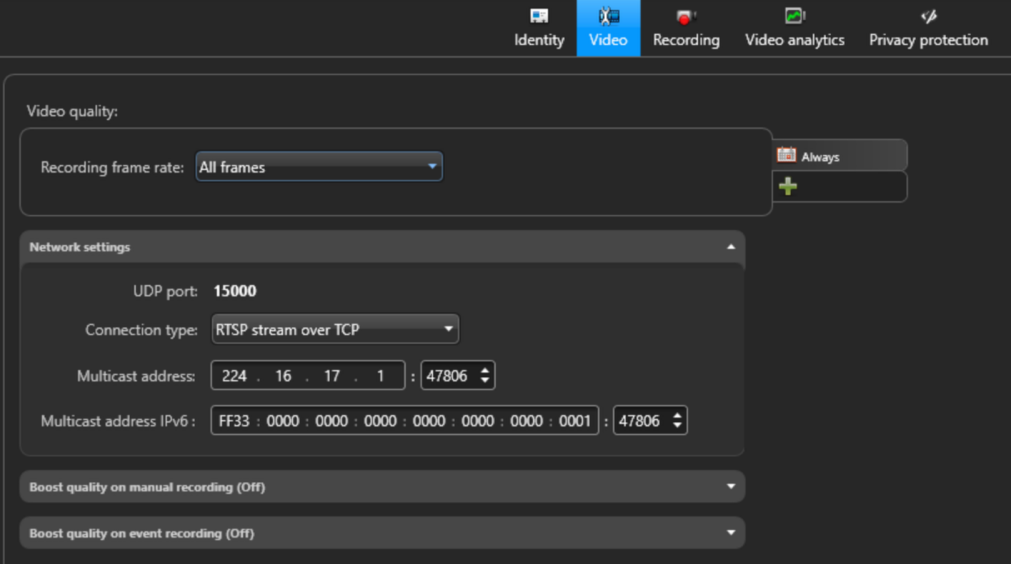
-
Click Apply.
-
Switch to the Identity tab.
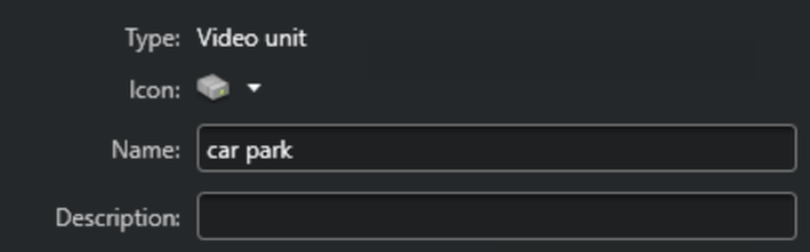
- Hold the Ctrl key and double-click the entity icon. The camera's GUID gets copied to your clipboard. Note it down as may be needed in a later step.
Custom event configuration (optional)
Custom events
ForensiQ can send events to Genetec Security Center, which can be used to trigger alarms or other actions. Both custom events and Genetec Security Center's built-in events can be used. By using custom events, you can create a more tailored integration, e.g. to better differentiate between different types of events.
If you do not need custom events configured, you may skip this section and proceed to Alarm configuration.
-
Click the Config Tool button in the upper left corner of the window.
-
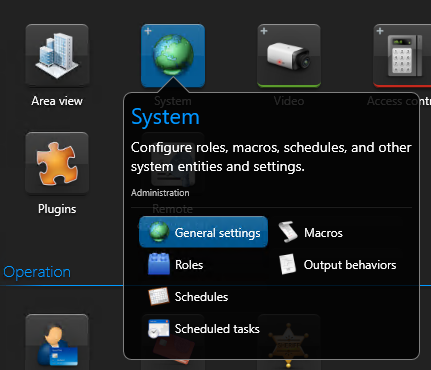
In the Administration category, select System General settings.
-
Select Events on the left sidebar. Click the green + button on the bottom of the screen to add an Event.
-
In the pop-up window, fill in the Event data according to the following:
- Name: Give your Event a custom name; in this example, Intrusion.
- Entity type: You may select any type - its only function is to help you recognise your Event by its icon/type.
- Value: The unique identifier of your Event. You may leave it as default or assign a new unique number.
Make sure to note down or copy the Event value number to clipboard, as it is going to be needed in a later step.
- Click Save.
Alarm configuration
- Click the Config Tool button in the upper left corner of the window.
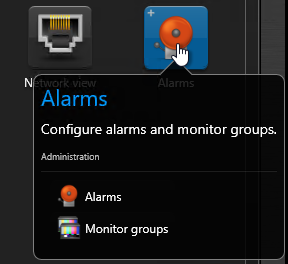
- In the Administration category, select Alarms.
- Click the + Alarm button on the bottom left corner of the window.
- Type any name, in this example,
Intrusion. - Open the Alarm's Properties tab. Click the green + button under the Recipients field and select the irisity user created above. Click Add.
- Click the green + button under the Attached entities field. Select the camera added in step 3, then click Add.
- Click Apply in the lower right corner of the window.
Automation configuration
-
Click the Config Tool button in the upper left corner of the window.
-
In the Administration category, select Automation.
-
In the bottom left corner of the window, click +Add an entity Automation.
-
Type a name for your Automation. In the upper button bar, select the Properties tab.
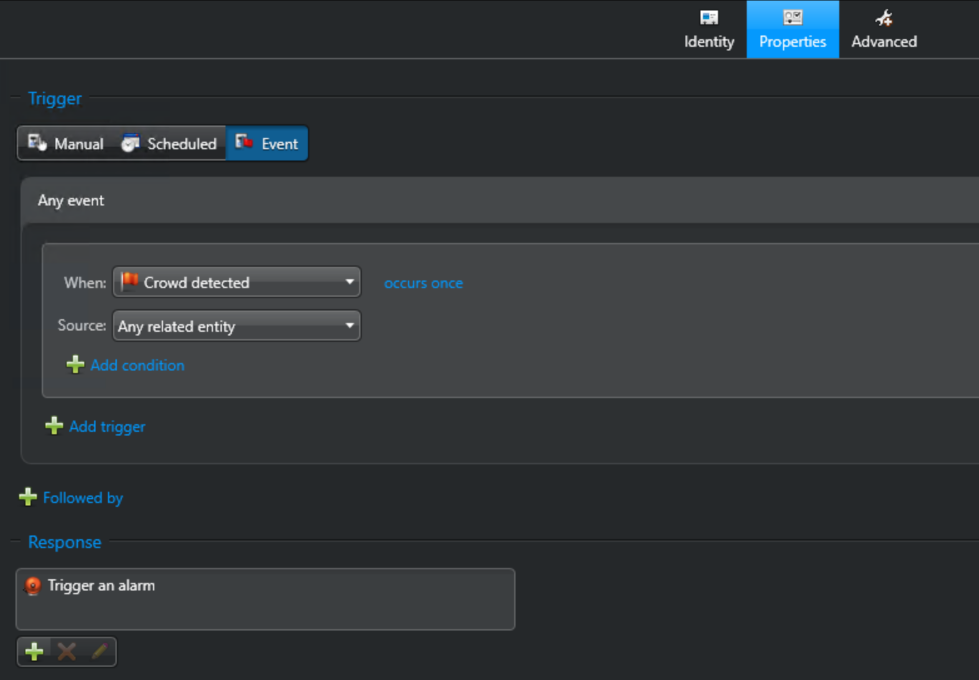
-
Select Event as the Trigger type. In the When field, select any Genetec Event, or the custom event, if you created one Custom event configuration. Select the camera you added in step 3 of Camera registration as the Source.
-
Click the green + button in the lower left corner of the window select Trigger an alarm.
-
Click Apply in the lower right corner of the window.
-
Make sure to click the Activate button in the bottom bar to enable the Automation.

All set - Your camera and associated Event is now ready to be viewed in Genetec Security Center - Security Desk.
ForensiQ configuration
Alarms can be configured to send detections to Genetec Security Center, appearing as a Genetec event type of your choice.
-
On the ForensiQ web UI, go to Settings Integration Targets.
-
Click the Add Integration Target button and select Genetec Security Center from the dropdown menu.
The base URL should be in the format http(s)://<server>:<port>/<WebSdk>/:
-
<server>: The hostname or IP address of your Genetec Security Center server. Make sure to use the correct protocol (http or https), depending on your SSL configuration. -
<port>: The port number configured for the Web-based SDK in the Genetec Config Tool, step 5. (4590by default). -
<WebSdk>: Type the value you set for the Web-based SDK in the Genetec Config Tool, in step 5. (WebSdkby default).
Fill in the rest of the fields as follows:
-
User name: The username of the Genetec Security Center user that will be used to authenticate with the server.
-
Password: The password of the Genetec Security Center user, above.
-
Event type: Select the event type used in the Automation step. If this is a custom event you set in step 4 of Custom event configuration, select Custom Event.
-
Custom event ID: If you created a custom event and used it to trigger alarms, type the Value you set in Step 4 of Custom event configuration. Otherwise, leave this field empty.
-
Custom event description (optional): A description of your event.
- Click Test to test the connection to Genetec Security Center click Create to save the integration settings.
Once Genetec Security Center is configured as an integration target, it will appear in the list of available alarm integrations when setting up a Live Rule.
Add Genetec cameras to ForensiQ
Registering cameras from Genetec Security Center manually
Note that, besides directly importing cameras from Genetec Security Center, you can also add RTSP cameras manually, as you would do with regular cameras.
In that case, make sure to paste the camera GUID you copied above, in Genetec SC, as the camera's Technical Name in ForensiQ. This will allow ForensiQ to correctly associate events with the camera in Genetec Security Center.
Integration configuration
- Open Genetec Security Center camera import settings from the Settings menu in the top right corner of the ForensiQ web UI.
The base URL should be in the format http(s)://<server>:<port>/<WebSdk>/:
-
<server>: The hostname or IP address of your Genetec Security Center server. Make sure to use the correct protocol (http or https), depending on your SSL configuration. -
<port>: The port number configured for the Web-based SDK in the Genetec Config Tool, step 5. (4590by default). -
<WebSdk>: Type the value you set for the Web-based SDK in the Genetec Config Tool, in step 5. (WebSdkby default).
Fill in the rest of the fields as follows:
-
Media gateway server: If you are using a custom Media Gateway server to connect to your Genetec Security Center installation, type the hostname or IP address of your Media Gateway server here. Otherwise, leave this field empty.
-
RTSP port (
654by default): The port number configured for RTSP streaming in the Genetec Security Center Config Tool. -
User name: The username of the Genetec Security Center user that will be used to authenticate with the server.
-
Password: The password of the Genetec Security Center user, above.
- Click Test configuration to test the connection to Genetec Security Center click Update configuration to save the settings.
Add Genetec cameras
-
Open Video Search from the top bar. On the left sidebar, navigate to the folder where you would like to add videos.
-
Click the button on the folder's row select Add Genetec Cameras from the dropdown menu.
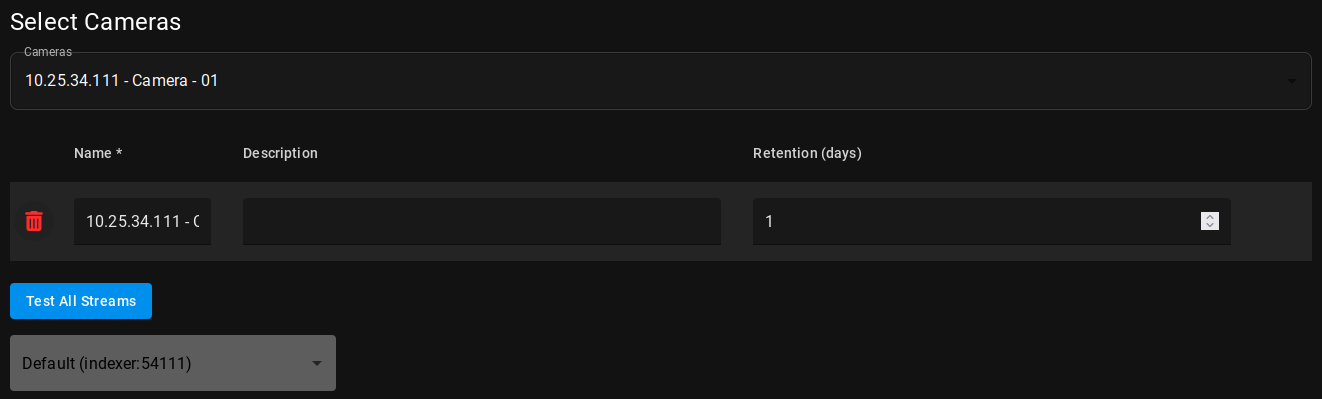
-
Click the Cameras drop-down menu Tick the checkbox of the cameras you want to add from the list of available cameras in Genetec Security Center.
-
Set the retention time for the cameras in the Retention field (in days, 1 by default), and type a description for them (optional). In case of a distributed system, you can also select the Indexer that will process the video streams from the cameras - otherwise, the default indexer will be used.
-
Click Test All Streams to check if the cameras meet all requirements. If the test is successful, a thumbnail preview of the stream will be displayed on the right, together with metadata, such as the resolution, frame rate, and codec of your stream.
-
Click Add Cameras to register the cameras and start indexing.
Media Gateway configuration (optional)
If you are using a custom Media Gateway server to connect to your Genetec Security Center installation, you need to configure both Genetec SC and ForensiQ to use the Media Gateway.
Genetec SC Media Gateway configuration
-
Log in to the Genetec SC installation server.
-
In the Genetec Security Center Config Tool, click the button in the upper left corner of the window.
-
In the System category, open Roles. Click the +Add an entity button on the bottom left corner of the window select Media Gateway.
-
In the popup window, select the server, where your Media Gateway is installed. Finish filling in the fields as needed.
-
Open your Media Gateway. In the Properties tab, set the following:
-
RTSP: Tick the checkbox to enable RTSP streaming through the Media Gateway.
-
User authentication: Tick the checkbox to enable authentication for the Media Gateway.
-
Accessible to: Click the button. Fill in the username and password of the Genetec Security Center user created in User management and access control.
- Click Apply in the lower right corner of the window to save the Media Gateway configuration.
ForensiQ Media Gateway configuration
-
On the ForensiQ web UI, go to Settings Genetec Security Center camera import settings.
-
In the Media gateway server field, type the hostname or IP address of your Media Gateway server.
-
Click Update configuration to save the settings.